Show the steps. Record the explanation.
Record an area, a window or your screen with system and microphone audio. Turn a bug report, product walkthrough or support answer into a recording you can edit and reuse.
At a glance
Zooms that follow
The view moves in on each click, then eases back out.
Click highlights
Every click gets a ring the eye can follow.
Keystrokes
Shortcuts show on screen as you press them.
Your camera
Record yourself with the screen, so people see you, not just your screen.
Separate tracks
Camera, mic and the Mac's own sound, each adjustable afterward.
A level voice
Your mic is leveled as you record, so nobody reaches for the volume.
Record your screen with audio
- Choose the scope of your recording. Use an area for a specific part of the screen, a window for one application, or a screen when the task moves between apps.
- Choose the audio you need. System audio records what the Mac plays; microphone audio records your explanation. Grant the relevant macOS permissions when prompted.
- Make a short test recording. Play it back to check the selected area and audio before recording a longer walkthrough. This is especially useful after changing microphones or permissions.
- Record the task and review it. Keep the steps focused on what the viewer needs to understand. Use the video editor to trim the result and add context.
SuperCapture is a desktop Mac recorder. It does not require a browser meeting or a cloud account for local recording and editing.
Make the important action easier to follow
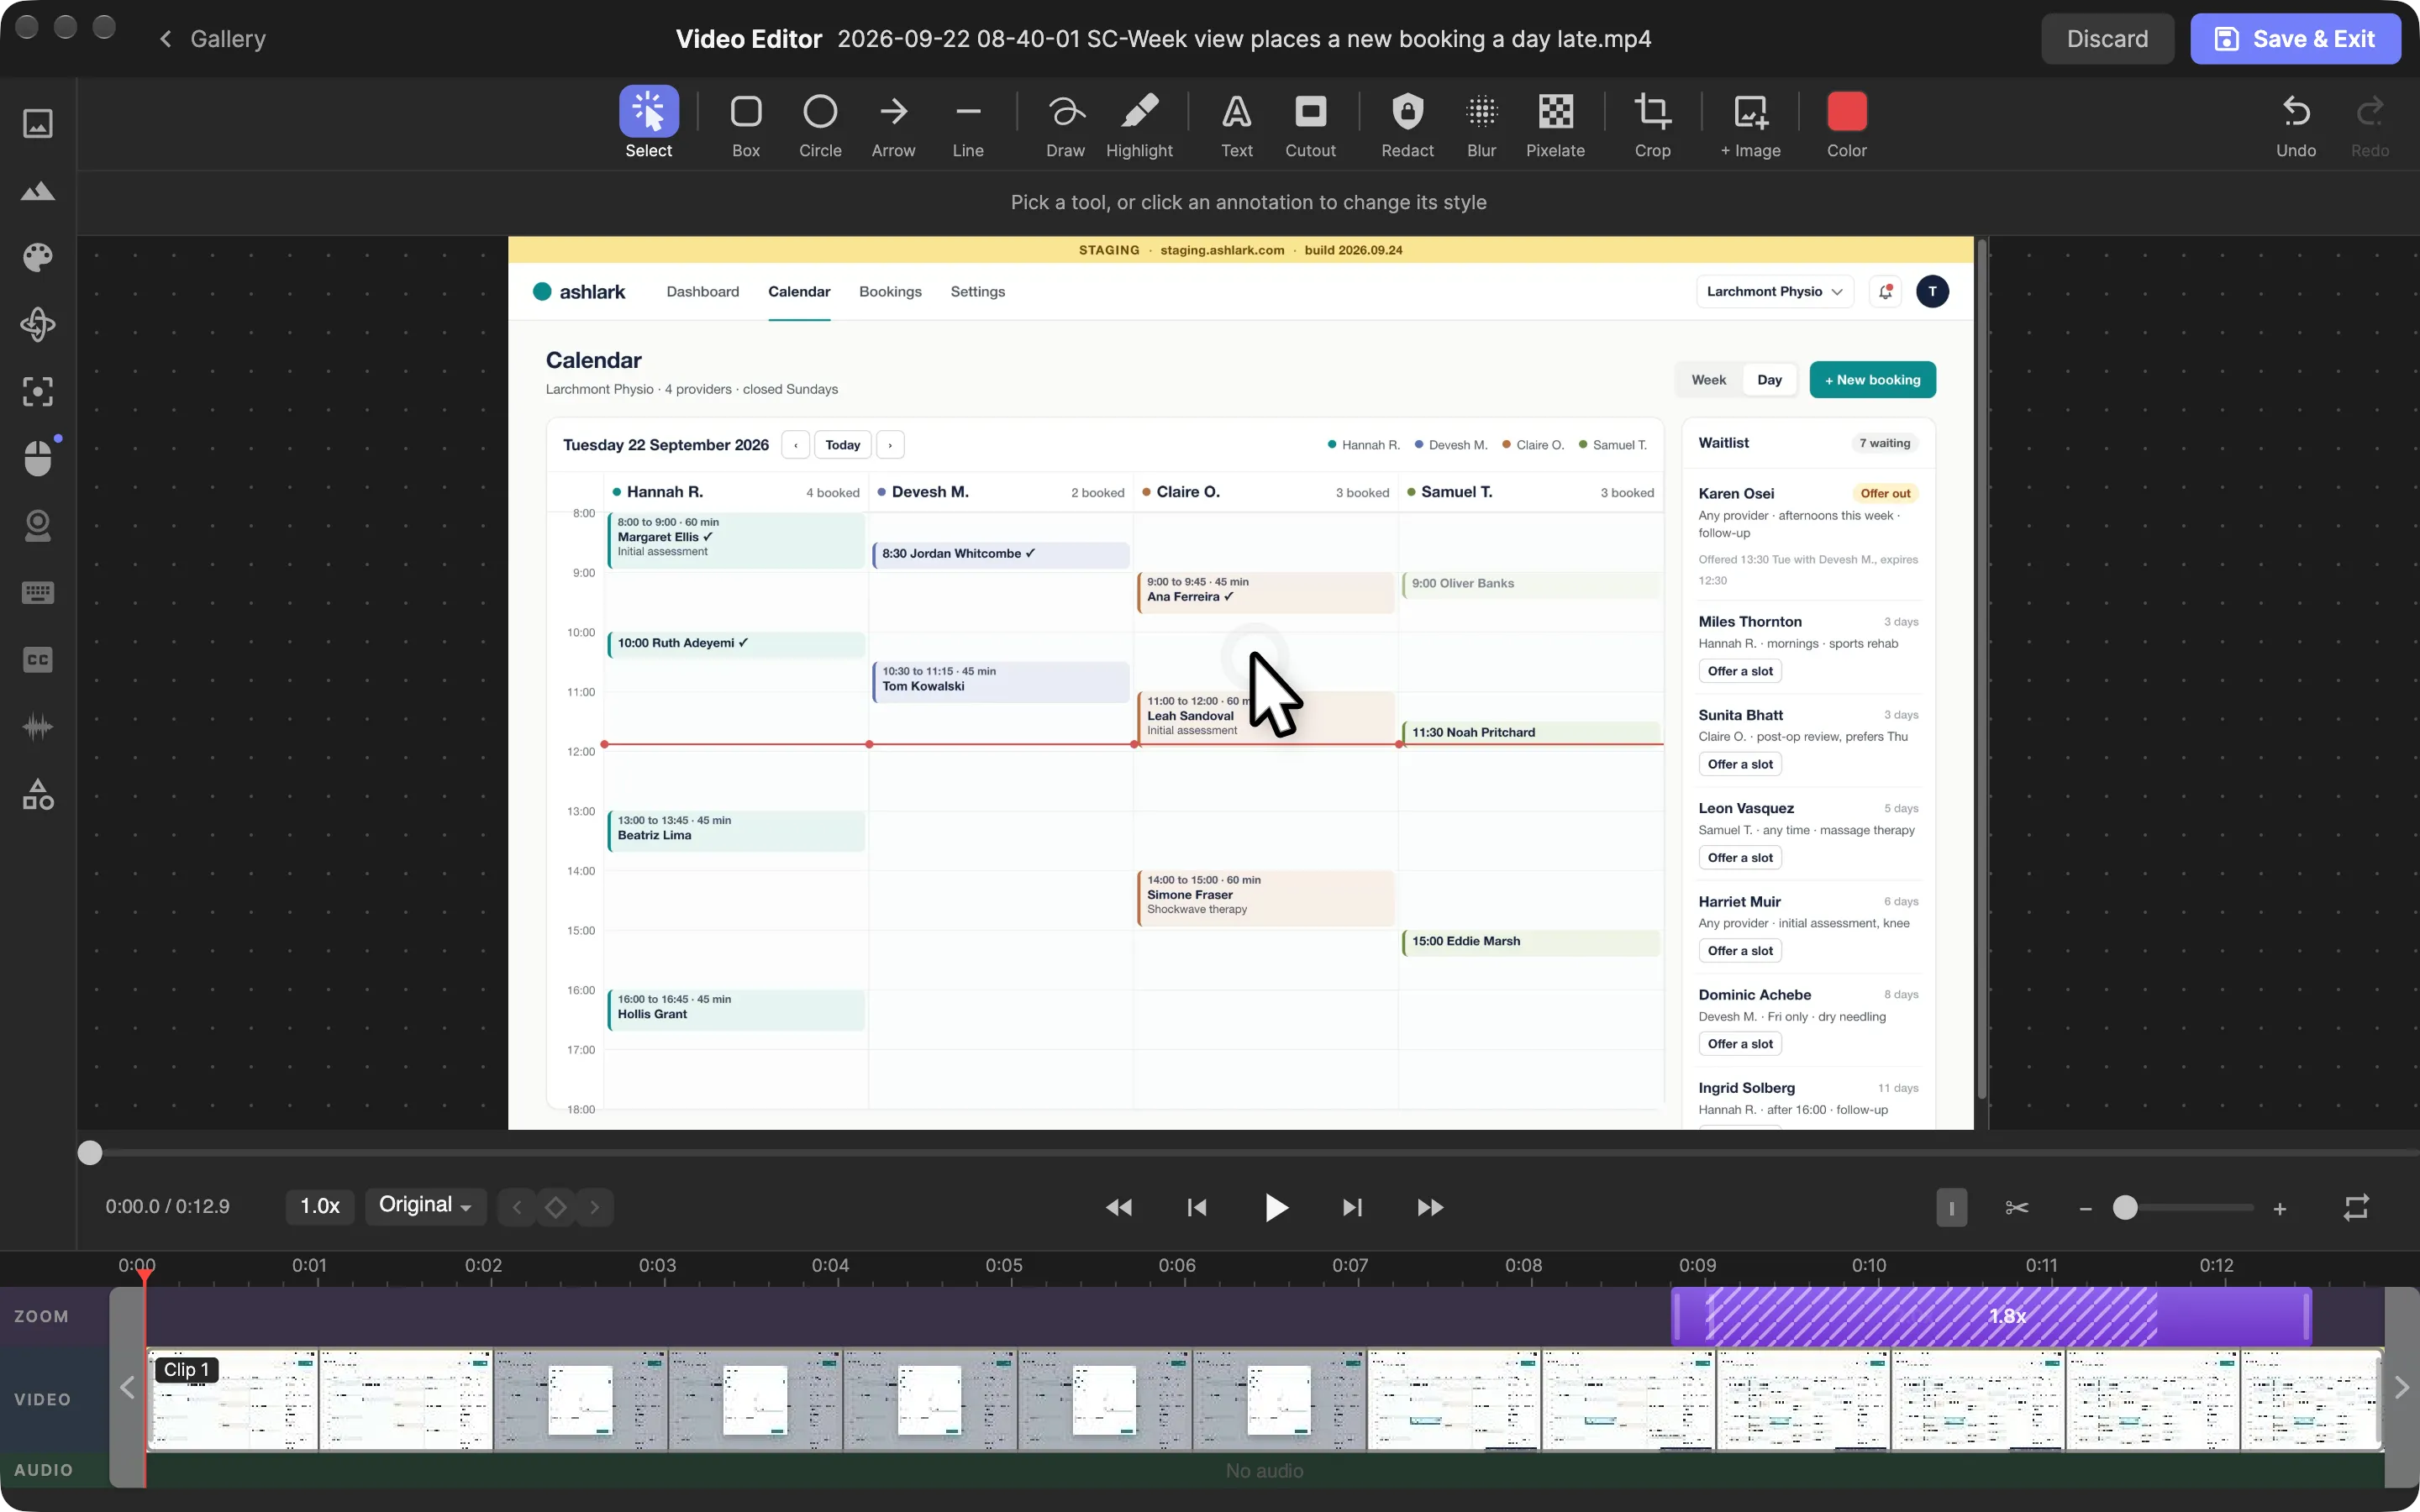
To tighten the narration, click Script in the video editor and edit the recording as text: delete a sentence and it’s cut from the video, or let Clean Up remove the filler words.
Mouse-click highlights help a viewer see where you clicked. Zoom regions can draw attention to a small control, and animated arrows, text and shapes explain a step directly in the recording.
For a support answer, show the starting state, perform the action, and leave the final result on screen long enough to read. For a bug report, capture the steps that lead to the problem and the visible result. Avoid including unrelated windows or personal information in the selected area.
Choose MP4 or GIF for the destination
Use MP4 when the viewer needs audio or a longer explanation. SuperCapture supports H.264 and H.265 video export; check the destination’s format support before choosing an encoding.
Use GIF for a short visual loop, such as demonstrating one interaction in a document or message. GIF does not carry an audio track. Keep the loop brief so the file stays practical to share.
The free plan includes light SuperCapture branding on video exports. Paid plans remove export branding. Compare plans for the current storage and sharing options.
If recording or audio is missing
Check the macOS screen recording permission for SuperCapture and microphone access when recording your voice. Make sure the intended audio source is selected and not muted, then repeat a short test. System Settings labels vary by macOS version.
If the problem persists, use the support links in the setup guide. Include your macOS version, app version and the steps that reproduce the issue; leave private recordings out of public reports.
Keep the result useful after the first share
A saved recording remains part of your SuperCapture library. Organize recurring answers in a collection so you can return to them, or enable optional cloud sync and sharing. Read the security overview before choosing how to share sensitive material.
Install SuperCapture for Mac to make your first recording. The current download requires macOS 15 or later and Apple Silicon.